Canning Nutritious Bone Broth
Canning bone broth is one of my favorite ways to make good use of bones that might otherwise be thrown away.
I save chicken carcasses, backs, necks, feet, beef bones, and turkey carcasses until I have enough for a large batch. If I am going to keep a stockpot or roaster going for hours, I want enough broth at the end to make it worth my time.
Once the broth is finished, pressure canning gives me another option besides filling the freezer. Quart jars are perfect when I need broth for soup or stew, while pints are handy for gravy, beans, rice, and sauces.
It is simple food, but it is one of the most useful things you can keep in a working pantry.
If you are filling your shelves during canning season, you can find more ideas in my collection of tomato canning recipes.
This post contains affiliate links. If you purchase through one of my links, I may earn a small commission at no additional cost to you.
Can You Water Bath Can Bone Broth?
No. Bone broth must be pressure canned.
Bone broth is a low-acid food and needs the higher temperatures reached inside a pressure canner. A water bath canner is not a safe way to preserve chicken broth, beef broth, or other meat-based stocks.
If you do not have a pressure canner, freeze your broth instead.
The good news is that pressure canning bone broth is fairly straightforward. Most of the work happens while making and preparing the broth.
What Bones Are Best for Bone Broth?
You do not need to buy special bones to make good homemade bone broth. Use what you have.
For chicken bone broth, I save:
- Chicken carcasses
- Backs
- Necks
- Wings
- Chicken feet
- Other meaty bones
Turkey carcasses make wonderful broth too. Once the meat has been removed, there is still plenty of flavor left in the bones.
For beef bone broth, I like using a mixture of bones. Marrow bones give the broth a deep, rich flavor, while joints and bones with plenty of connective tissue help add gelatin and body.
Pork and venison bones can also be used to make homemade broth.
If you raise your own animals for meat, making broth is simply another way to use more of what you have already put the work into raising. I have written about some of the harder parts of raising animals for your own food, and for me, making good use of the animal is an important part of that.
Using Chicken Feet in Bone Broth
If you butcher your own chickens, save the feet.
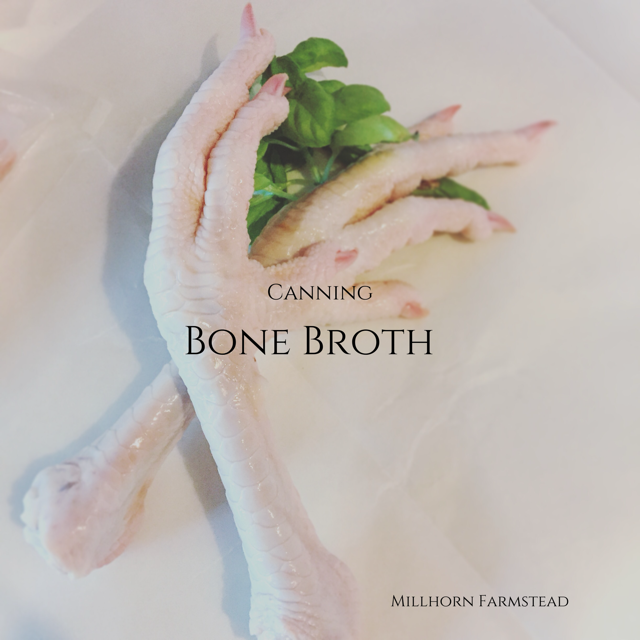
Chicken feet contain a lot of connective tissue and are one of my favorite additions to homemade chicken bone broth. They can help give the finished broth that rich, gelatinous consistency everyone hopes for once the broth cools.
I usually combine chicken feet with carcasses, backs, necks, and whatever other chicken bones I have saved rather than making broth entirely from feet.
Clean and prepare the feet, then tuck them into the freezer with your other bones until you have enough for a batch.
It is a simple way to get a little more from every chicken you raise.
How to Make Bone Broth for Canning
Place your bones in a large stockpot or roaster and cover them with water.
When making beef bone broth, you can roast the bones first for a deeper flavor. Chicken and turkey carcasses can go directly into the pot.
Bring the water up to temperature, then reduce the heat and let the broth cook gently.
I prefer making a long-cooked bone broth, especially when I am using chicken feet, joints, and other bones with plenty of connective tissue. I want a rich broth with enough flavor that I will be happy to pull it off the pantry shelf and cook with later.
Once the broth is finished, remove the large bones and strain it well.
Does Bone Broth Have to Gel?
A cold jar of bone broth that sets up almost solid is a beautiful thing, but it is not the only sign of a good batch.
Whether bone broth gels depends on the bones you use, how much connective tissue they contain, how much water you add, and how the broth is cooked.
Chicken feet, backs, necks, and joint bones are particularly helpful when you want a broth with plenty of gelatin.
If your bone broth stays liquid after chilling, you can still use it. It does not need to gel before it can be pressure canned.
Pressure Canned Bone Broth
Ingredients
Method
- Make the broth. Place the bones in a large stockpot or roaster. Add the chicken feet, if using, along with the onion skins, celery heart and leaves, garlic cloves, and carrot tops.
- Cover everything with water.
- Bring the pot to a boil, then reduce the heat to a very low simmer. Cover and allow the broth to slowly simmer for 24 hours.
- Check the broth occasionally and add enough water as needed to keep the bones covered.
- After 24 hours, remove the bones and strain the broth thoroughly, removing the onion skins, celery, garlic, carrot tops, and all other solids.
- Cool the strained broth and refrigerate until the excess fat rises and firms on the surface. Remove the excess fat.
- Return the strained broth to a large pot and bring it back to a boil before filling your jars and proceeding with the pressure-canning instructions.
Preparing Bone Broth for Canning
Once the broth is finished, strain it well and cool it so the excess fat can be removed.
I find this much easier after the broth has been chilled. The fat rises to the top and firms up, making it easy to lift off rather than trying to skim small droplets of fat from a hot stockpot.
Remove the excess fat before canning.
Return the strained broth to the stove and bring it back to a boil.
While the broth is heating, prepare your jars and pressure canner.
Making use of what we produce is something I practice throughout the kitchen. The same principle applies when I am working with milk and cream, whether I am making homemade butter and buttermilk or putting meat bones back into the stockpot for another meal.
How to Pressure Can Bone Broth
Once the broth is strained, the excess fat has been removed, and the broth is hot, you are ready to fill the jars.
You will need:
- Hot bone broth
- Clean pint or quart canning jars
- Canning lids and rings
- Canning funnel
- Jar lifter
- Pressure canner
Ladle the hot broth into hot jars, leaving 1 inch of headspace.
Wipe the jar rims carefully before applying the lids. Broth can leave grease on the rim, so make sure each rim is clean before adding the lid and ring.
Place the jars in your pressure canner.
Vent and operate your pressure canner according to the manufacturer’s instructions.
How Long to Pressure Can Bone Broth
The processing time for bone broth depends on the size of the jar.
| Jar Size | Processing Time | Headspace |
|---|---|---|
| Pints | 20 minutes | 1 inch |
| Quarts | 25 minutes | 1 inch |
The processing time stays the same, but the pounds of pressure change according to your altitude and the type of pressure canner you are using.
Dial-Gauge Pressure Canner
| Altitude | Pressure |
|---|---|
| 0 to 2,000 feet | 11 pounds |
| 2,001 to 4,000 feet | 12 pounds |
| 4,001 to 6,000 feet | 13 pounds |
| 6,001 to 8,000 feet | 14 pounds |
Weighted-Gauge Pressure Canner
| Altitude | Pressure |
|---|---|
| 0 to 1,000 feet | 10 pounds |
| Above 1,000 feet | 15 pounds |
Start counting the processing time only after the pressure canner has reached the correct pressure.
If the pressure drops below the required amount during processing, bring the canner back to the correct pressure and begin the processing time again.
When processing is complete, turn off the heat and allow the canner to depressurize naturally.
Do not try to hurry this part.
Cooling and Storing Canned Bone Broth
Once the pressure canner has completely depressurized, remove the jars according to the instructions for your canner.
Set the hot jars somewhere they can remain undisturbed while they cool.
After 12 to 24 hours, check each seal. Remove the rings, label the jars, and add the date before putting them into storage.
Store properly sealed jars in a cool, dry, dark place.
A shelf full of broth may not be as colorful as peaches canned in honey or bread and butter pickles, but it is every bit as useful.
Broth is something I can turn into dinner.
How to Use Home-Canned Bone Broth
A quart of canned bone broth can become the beginning of soup or stew without having to thaw anything first. Pint jars are useful when I only need a cup or two.
I use homemade bone broth for:
- Soups and stews
- Beans
- Rice and other grains
- Gravy
- Sauces
- Cooking vegetables
- Recipes that call for chicken stock or beef stock
Broth is particularly useful during the colder months when we eat more soups, stews, and one-pot meals.
Pair a quart of broth with home-canned stewed tomatoes, meat, and a few pantry staples, and you already have the beginning of dinner.
That is how I prefer to stock a pantry. I want ingredients that can be used several different ways rather than jars that sit on the shelf because nobody knows what to do with them.
During tomato season, I use the same approach with homemade Bloody Mary mix. Preserve something you already enjoy and know you will actually use.
Why I Keep Bone Broth on the Pantry Shelf
Freezer space is valuable on a homestead.
Between meat, garden produce, and everything else we put away, I do not want to use freezer space for something I can safely keep on a pantry shelf.
There is another advantage too.
Power outages happen.
Here in North Idaho, winter weather can turn a power outage into more than a minor inconvenience. When the electricity goes out, everything in the freezer becomes something you have to think about.
Home-canned bone broth does not require electricity for storage.
That makes it useful for everyday cooking and a practical addition to an emergency food supply.
I am not interested in filling shelves with food we would only eat during an emergency. I would rather preserve ingredients we already use.
Bone broth fits that perfectly.
The same is true of vegetables from the garden. When tomatoes are coming in faster than we can eat them fresh, I preserve them in ways I know we will use later, including canning stewed tomatoes and making green tomato enchilada sauce.
If you are preparing the rest of your property for colder weather too, my guide to managing freezing temperatures on the homestead covers some of the practical things that matter once temperatures start dropping.
Frequently Asked Questions About Canning Bone Broth
Can You Water Bath Can Bone Broth?
No. Bone broth is a low-acid food and must be processed in a pressure canner. Water bath canning is not a safe method for preserving meat broth or stock.
How Long Do You Pressure Can Bone Broth?
Process pint jars for 20 minutes and quart jars for 25 minutes at the correct pressure for your altitude and type of pressure canner.
How Much Headspace Do You Need When Canning Bone Broth?
Leave 1 inch of headspace in both pint and quart jars.
Do You Have to Remove the Fat Before Canning Bone Broth?
Remove the excess fat before filling the jars.
Chilling the broth first makes this much easier. Once cold, the fat firms up across the top and can usually be lifted away.
Why Didn’t My Bone Broth Gel?
The amount of gelatin in bone broth depends largely on the bones you used, how much connective tissue they contained, and your ratio of bones to water.
Chicken feet, backs, necks, joints, and other connective bones generally produce more gelatin than bare bones.
Bone broth does not need to gel to be useful.
Can You Pressure Can Chicken Bone Broth?
Yes. Chicken broth can be pressure canned in pint or quart jars using the appropriate processing time and pressure for your altitude.
Chicken carcasses, backs, necks, and feet can all be useful when making homemade chicken broth.
Can You Pressure Can Beef Bone Broth?
Yes. Beef broth can also be pressure canned.
A combination of marrow bones and bones containing joints and connective tissue makes a rich beef bone broth that works well for soups, stews, gravy, and other meals.
Can I Add Vegetables, Noodles, or Beans Before Canning Bone Broth?
Do not add substantial amounts of vegetables, noodles, rice, beans, or other ingredients and then use the plain bone broth processing times in this article.
Once you add those ingredients, you are canning a different product and need to follow tested processing instructions written for that combination of ingredients.
What Should I Do If a Jar of Bone Broth Doesn’t Seal?
Do not put an unsealed jar on the pantry shelf.
Refrigerate it and use it promptly, freeze it, or reprocess it promptly using an appropriate tested method and a new lid.
Canning Bone Broth for a Working Homestead Pantry
Canning bone broth is not complicated, but it is one of those projects that continues paying you back long after canning day is over.
You have already raised or bought the animal. You have already cooked the meat. The bones still have something useful to give.
Making broth turns them into another food for your family, and pressure canning makes that broth ready whenever you need it.
Instead of digging through the freezer and waiting for a container of broth to thaw, I can walk into the pantry and grab a jar.
That is exactly the kind of food I want filling our shelves.
My Favorite Pressure Canner
I have used an All American Pressure Canner for years, and it is still the canner I recommend for putting up large batches of food.
Shop the All American Pressure Canner
It is heavy, built to last, and does not use a rubber gasket that needs to be replaced. If you plan to pressure can broth, meat, vegetables, or other low-acid foods regularly, a good pressure canner is worth the investment.
More Recipes for a Prepared Pantry
-
Canning Taco Soup: A Hearty Beef and Bean Meal in a Jar
There comes a point every canning season when I stop wanting to put individual ingredients on…
-
Canning Sloppy Joes: An Easy Meal in a Jar Recipe
Canning sloppy joes is one of my favorite ways to turn ground beef and tomatoes into…
-
Homemade Bloody Mary Mix | Canning Recipe
Have you ever tasted a Bloody Mary mix that actually tastes like real tomatoes? Not the…
-
Green Tomato Enchilada Verde Sauce for Canning
Canning Green Tomato Enchilada Sauce When fall frost is around the corner, I inevitably end up…
-
Canning Peaches in Honey
Canning peaches in honey is one of my favorite ways to preserve fresh peaches without using…
-
Dill Pickle Canning Recipe | Crisp Garlic Dill Pickles
There are a few things I make every summer without fail, and this dill pickle canning…